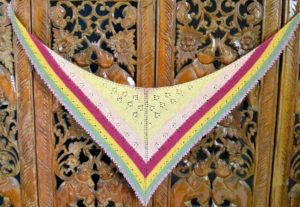
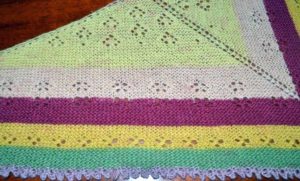
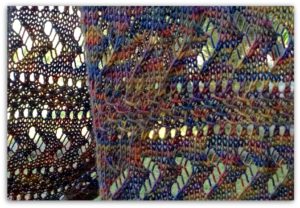
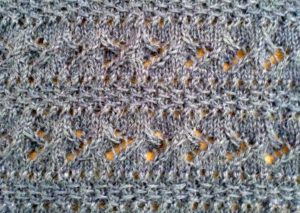
Category Archives: Blog posts

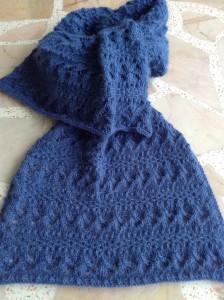
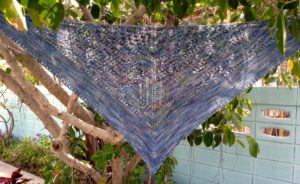
Cosmic Blues

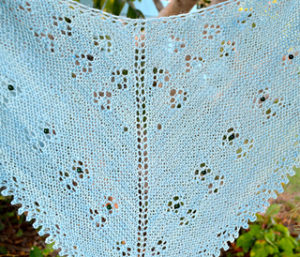
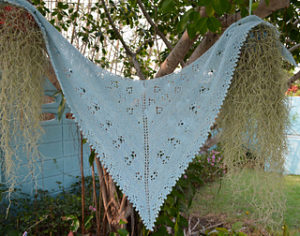
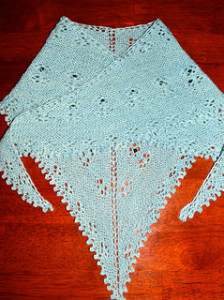
This top-down triangular knit lace shawl incorporates a few of the ideas that I’ve written about over the last few weeks.

CB1

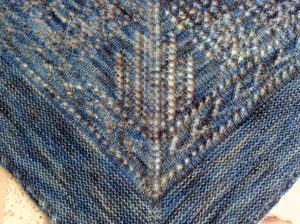
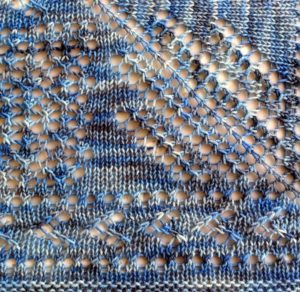
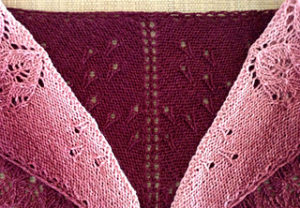
You’ll find a combination of visible and invisible center spine increases and a pattern based on a particular yarn – in this case the colors in particular.

The colors in this yarn took me back a few decades to Janis Joplin and her Kozmic Blues. No serene night sky here, but this accessory will keep you warm on a cool starry night!

CB5

I hand knit this accessory from my original design, using Araucania Botany Lace 100% extra-fine merino yarn (color: 1795, blues), using nearly all of a 100g skein.

The top-down triangular shawl measures 49 x 20 inches (124.5 x 51 cm). This yarn is such a delight to work with, and I’m so glad I bought a few other colorways for upcoming projects.

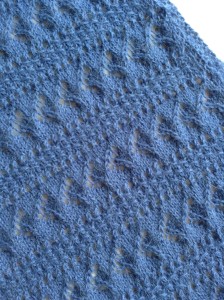
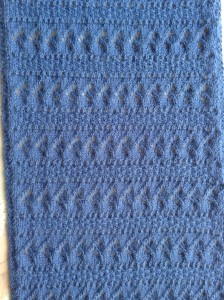
While the yarn for Cosmic Blues is called a lace yarn, it is a bit more substantial than traditional lace and creates both a fabric with body and stitches that are clearly defined.

CB4

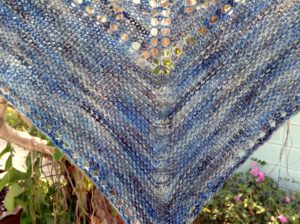
Note that the bottom section of the shawl is knit in rows of garter, with a more invisible type of increase along the center spine.

CB3

If you have a moderate amount of lace knitting experience you should find this an interesting knitting project.

Let me know if you have any questions, comments or suggestions.

The shawl is available for purchase on Etsy; and the pattern (written instructions) is available on Ravelry.

Happy Knitting!
MikeH


Knit Triangular Shawl Central Spine Increases: Visible and Invisible (Stockinette Stitch)

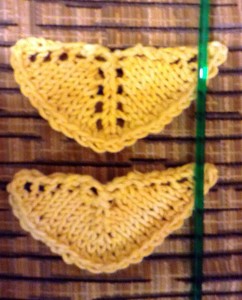
When you’re knitting a triangular top-down shawl you have a choice whether to make the increases along the central spine visible or (nearly) invisible. [If you’re knitting in garter stitch, refer to last week’s post on this topic.]

SSI1

If your design includes some eyelet or lace stitches, you might want to make the spine increases visible to add to the overall open or lace effect. If your pattern doesn’t incorporate lace you might want to make these increases less visible, creating a less interrupted fabric.

Here’s a way to construct a simple triangular, top-down shawl. Whether you’re looking to make the central spine increases visible or invisible, start out like this (abbreviation key at end of instructions):

CO 3 stitches
Row 1: K1, YO, K1, YO, K1 (5 stitches)
Row 2: Purl across
Row 3: K1, YO, K1, YO, PM, K1, PM, YO, K1, YO, K1 (9 stitches)
Row 4: Purl across

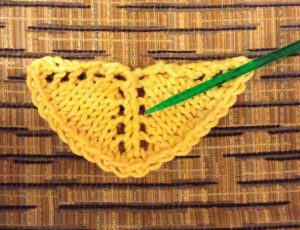
For visible central spine increases, continue as follows:

SSI2

Row 5: K1, YO, K3, YO, (PM) K1, (PM) YO, K3, YO, K1 (13 stitches)
Row 6: Purl across
Row 7: K1, YO, K5, YO, (SM) K1, (SM) YO, K5, YO, K1 (17 stitches)
Row 8: Purl across
Row 9: K1, YO, K7, YO, (SM) K1, (SM) YO, K7, YO, K1 (21 stitches)
and so on…
As you can see, for each odd-numbered row you start with K1, YO, and knit across to the center K stitch, and do a YO on each side of it, slipping the markers to keep them on each side of the central K stitch. YO before the last stitch, K1 (on each right-side row you’ll increase 4 stitches).

You continue this way until the shawl reaches the dimensions you want, and then bind off loosely.

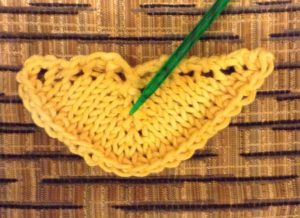
For invisible central spine increases, continues as follows (after the first 4 rows):

SSI3

Row 5: K1, YO, K3, M1R, (PM) K1, (PM) M1L, K3, YO, K1 (13 stitches)
Row 6: Purl across
Row 7: K1, YO, K5, M1R, (SM) K1, (SM) M1L, K5, YO, K1 (17 stitches)
Row 8: Purl across
Row 9: K1, YO, K7, M1R, (SM) K1, (SM) M1L, K7, YO, K1 (21 stitches)
and so on…
As you can see, for each odd-numbered row you start with K1, YO, and knit across to the stitch before the marker and M1R in that stitch, SM, K1, SM, M1L in the next stitch, knit across until you have 1 stitch left on your left needle, and then YO, K1 (on each right-side row you’ll increase 4 stitches).

Abbreviations:
CO (cast on)
K (knit)
M1(R or L)  (knit in the bar between 2 stitches, to increase 1 stitch)
YO (yarn over, to increase 1 stitch)
PM (place marker on needle)
SM (slip marker to other needle)

See my shawl patterns on Ravelry and Craftsy, and some of my hand-knit shawls on Etsy.

Happy knitting!
MikeH

Knit Triangular Shawl Central Spine Increases: Visible and Invisible (Garter Stitch)

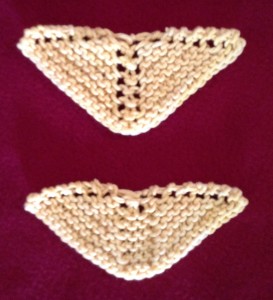
When you’re knitting a garter stitch shawl, you’ll typically end up with an accessory that’s reversible and you’ll also have a choice whether to make the increases along the central spine visible or (nearly) invisible.

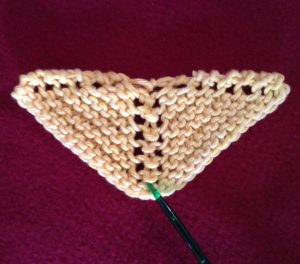
Spine increases garter 1
If your design includes some eyelet or lace stitches, you might want to make the spine increases visible to add to the overall open or lace effect. If your pattern doesn’t incorporate lace you might want to make these increases less visible, creating a less interrupted fabric.

Here’s a way to construct a simple triangular, top-down shawl. Whether you’re looking to make the central spine increases visible or invisible, start out like this (abbreviation key at end of instructions):

CO 3 stitches
Row 1: K1, YO, K1, YO, K1 (5 stitches)
Row 2: Knit across
Row 3: K1, YO, K1, YO, PM, K1, PM, YO, K1, YO, K1 (9 stitches)
Row 4: Knit across

For visible central spine increases, continue as follows:

Spine increases garter visible
Row 5: K1, YO, K3, YO, (PM) K1, (PM) YO, K3, YO, K1 (13 stitches)
Row 6: Knit across
Row 7: K1, YO, K5, YO, (SM) K1, (SM) YO, K5, YO, K1 (17 stitches)
Row 8: Knit across
Row 9: K1, YO, K7, YO, (SM) K1, (SM) YO, K7, YO, K1 (21 stitches)
and so on…
As you can see, for each odd-numbered row you start with K1, YO, and knit across to the center K stitch, and do a YO on each side of it, slipping the markers to keep them on each side of the central K stitch. YO before the last stitch, K1 (on each right-side row you’ll increase 4 stitches).

You continue this way until the shawl reaches the dimensions you want, and then bind off loosely.

For invisible central spine increases, continues as follows (after the first 4 rows):

Spine increases garter invisible
Row 5: K1, YO, K2, KFB, (PM) K1, (PM) KFB, K2, YO, K1 (13 stitches)
Row 6: Knit across
Row 7: K1, YO, K4, KFB, (SM) K1, (SM) KFB, K4, YO, K1 (17 stitches)
Row 8: Knit across
Row 9: K1, YO, K6, KFB, (SM) K1, (SM) KFB, K6, YO, K1 (21 stitches)
and so on…
As you can see, for each odd-numbered row you start with K1, YO, and knit across to the stitch before the marker and KFB in that stitch, SM, K1, SM, KFB in next stitch, knit across until you have 1 stitch left on your left needle, and then YO, K1 (on each right-side row you’ll increase 4 stitches).

Next week, I’ll show you how this is done in stockinette stitch.

Abbreviations:
CO (cast on)
K (knit)
KFB (knit in the front and back of the stitch)
YO (yarn over, to increase 1 stitch)
PM (place marker on needle)
SM (slip marker to other needle)

See my shawl patterns on Ravelry and Craftsy, and some of my hand-knit shawls on Etsy.

Happy knitting!
MikeH

Designing a Lace Shawl Based on a Specific Yarn

VR1

Sometimes the yarn comes first! I found this yarn (on Etsy!) that was too hard to resist. It reminded me of a vineyard in the rain, although I’m not sure why!

So I bought a 100-gram ball of Wollelfe merino fingering weight yarn in the Bordeaux gradient and started designing a pattern to go along with it.
VR2
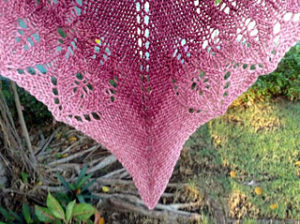
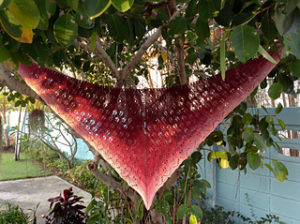
At the top center of Vineyard Rain you’ll find raindrops, and then through the body of the shawl lots of vineyard leaves, beginning with the bordeaux color and finishing off with a light rose – as a result of the rain!

There’s a background of purl stitches on the right side of the shawl, with some additional raindrops at the tips of the topline.

VR3

If you have some basic lace knitting experience you should have no trouble with the pattern and end up with a lovely accessory.

The shawl measures 23 x 48 x 52 inches / 
58.5 x 122 x 132 cm.

The pattern is available on Ravelry and the shawl is for sale on Etsy.

Happy knitting!
MikeH

Buds and Flowers Reversible Shawlette: What a Difference Small Changes Can Make

I wanted to show you another variation on a pattern this week. This time, a casual bandana-style lace knit scarf becomes a feminine shawlette in a lovely pastel shade, enhanced by jadeite beads.
BFA5
The changes to the basic Heart Shaped Reversible Buds and Flowers Shawlette pattern included a change in yarn color, an increase in the size of the knitting needles, and the addition of beads across one pattern row.

BFA2
I used larger sized needles than the pattern calls for: 3.75mm instead of 3.5mm (US 5 instead of US 4). I knit shawlette with the same weight yarn, but changed to Araucania Ranco, hand-dyed in aqua shades, using a bit less than 340 yards/310 meters – less than 1-100g skein.

A final touch was the addition of 18-6mm dark green jadeite beads. I used the crochet hook method to insert a single bead in the middle of each flower across the width of the shawlette.
BFA1
Dimensions after blocking:
21 inches (53.5cm) from the center of the top to the tip of the bottom point
47 inches (119.5cm) across, at the widest point
51 inches (129.5) measured across the top edge
BFA3

The pattern is one of mine on Ravelry. You’ll find instructions for the variation on that page.

If you like, you can buy this accessory from my Etsy shop.

Happy knitting!
MikeH

Variations on a Shawl Pattern

NYGV shawl

The first time around I knit my Not-Your-Garden-Variety Shawlette I chose a West Yorkshire Spinners fingering-weight yarn (color: cayenne)  I bought on a trip to the U.K.

I wanted to see what the design looked like in a heavier-weight yarn, with a few beads added as an embellishment, and in a color that actually reminded me of a flowering garden.
il_570xN.716663793_4mb1

In knitting this variation, I used the same size needles that pattern calls for (US 6/4.0mm), chose a DK-weight yarn (Artesano British Wool; color: bluebell) 3-50g skeins, and incorporated 16-8mm translucent glass beads (color: wheat), to resemble beads of dew on one of the rows of blossoms.

il_570xN.716663977_ayg1

il_570xN.716540446_i3az

Measurements after blocking: 43 inches (110cm) across the top; 24.5 inches (62cm) from top to end of bottom point.

The pattern is one of mine on Ravelry. You’ll find instructions for the variation on that page.

The shawlette is also available for purchase in my Etsy shop.

Thanks for stopping by, and happy knitting!
MikeH

Blocking a Knit Lace Shawl – and My Latest Pattern

TTLKS1Palm trees grow everywhere in Thailand, from the sea to the mountains, and the landscapes are a lush green throughout the year.

For my newest shawl pattern I decided to incorporate these elements in the design of a shawl that’s a suitable accessory in the tropics year-round, and for spring and summer in less tropical climes.

This soft and elegant rectangular Thai Tropics shawl is knit with Manos lace (2-ply), a blend of baby alpaca, cashmere, and silk, and it’s as luxurious as it sounds! It features a panel of palm fronds and a panel of palm leaves, set against a background of open lacework.

Dimensions after blocking: 18×64 inches (46x162cm)
TTLKS

As you can see from the photos the lace design elements are clearly defined and the piece has a very finished look to it.

It doesn’t come off the needles looking like this, however! That’s one reason the dimensions are noted “after blocking.”

Wet blocking of lace knit items is necessary to stretch out and give shape to the piece, and to open up the lace stitch structure. If you simply stretch the item when it is dry, it will spring back and not maintain the desired shape and size.

Here’s a look at the palm fronds end of my Thai Tropics shawl before blocking:

TTLKSPreBlock3
I should add here that I resisted the blocking step of producing lace knit accessories for quite a while, even though I knew this step was an important one.  The whole process looked too difficult and I didn’t have the tools I needed, so I stretched and smoothed the scarves and shawls and went back to my knitting.

I’ve since gone back and wet blocked these pieces, and what a difference it makes!

The process is not complex and the tools are relatively easy to acquire. It helps if you have:

1. Interlocking play mats or blocking mats –  I use play mats simply because they cost less and are easy to find in toy stores and many discount or department stores. Blocking mats are considered a specialty item and are considerably more expensive.
2. Knitting blocking wires [or a knitting blocking kit (with pins)] – Threading these wires along the edges of a shawl or scarf ensures a straight edge and helps in the stretching process. Using wires also means using fewer pins.
3. Stainless steel T-pins – If you didn’t get pins with your wires, you should buy some good quality stainless steel pins (to keep them from rusting and staining your knitted item).

There are lots of helpful websites and videos to take you through the wet blocking process, so it doesn’t make sense for me to repeat the steps here.

Here’s an article that I have found to be particularly useful:
http://www.knittersreview.com/article_how_to.asp?article=/review/product/120322_a.asp

And here’s a look at my new Thai Tropics Lace Knit Shawl in the wet blocking process.

TTLKSBlock

I hope you give the pattern a try, and try out the wet blocking technique on your next lace knit accessory.

If you’d like to purchase this shawl, rather than the pattern, it’s available in my Etsy shop (ScarvesShawlsandMore).

Happy knitting – and blocking!
MikeH

Practice Basic Lace Knitting Stitches – and Knit a Scarf!

BV1_medium2

Unbelievably light and soft, this Blossoms and Vines Lace Scarf was designed to be knit with lace-weight alpaca yarn on US 2-1/2 (3mm) needles.

The amount of yard required is 275-290 yards (251-265 m) for a finished accessory that measures around 6.5 x 55 inches (16.5 x 140cm).

This is the second of two patterns I created that were inspired by traditional English gardens I was fortunate enough to encounter on a trip to the U.K. earlier this year. The design is based on my impressions of trellised vines and a multitude of blossoms and is meant to have a vintage feel.

The pattern is quite straightforward and can be knit by anyone with a bit of lace knitting experience.

If you have limited experience with lace knitting, you might want to practice a few of the rows from this scarf pattern to improve your technique before taking on the whole pattern.

The following abbreviations are used in the instructions. If you don’t understand how to perform the actions after reading the descriptions, try searching on YouTube for relevant videos.

Abbreviations:
K2tog (knit 2 stitches together from the left needle – to decrease 1 stitch)
SKP (slip 1 stitch, knit the next stitch on the left needle, and pass the slipped stitch over the knit stitch – to decrease 1 stitch)
SK2P (slip 1 stitch as if to knit, knit the next 2 stitches together, and pass the slipped stitch over the 2 stitches that were knit together – to decrease 2 stitches)
YO (yarn over, to increase 1 stitch)

You might want to try knitting the pattern rows seen below with larger needles and heavier yarn, to make it easier to see what you’re doing as you practice. [Note that the actual pattern will emerge after you’ve blocked the finished scarf. I’ll talk about blocking lace knit items in next week’s blog.]

Repeat these four rows as many times as you’d like until you’re comfortable with the various stitches and satisfied with the result. These will not produce the full 12-row pattern seen in the scarf, and are meant for practice only.

Cast on 39 stitches and knit across all stitches for 4 rows
Then:
Row 1:
K2, YO, SKP, P1, K2tog, YO, K3, YO, SKP, P1, K7, K2tog, YO, K1, YO, SKP, K1, P1, K2tog, YO, K3, YO, SKP, P1, K2tog, YO, K2
Row 2: K2, P2, K1, P7, K1, P13, K1, P7, K1, P2, K2
Row 3: K2, YO, SKP, P1, K2, YO, SK2P, YO, K2, P1, K6, K2tog, YO, K3, YO, SKP, P1, K2, YO, SK2P, YO, K2, P1, K2tog, YO, K2
Row 4: Repeat Row 6

Now it’s time to knit the scarf! You can find the pattern on Craftsy or Ravelry for USD 2.25.

BVC2

Let me know if you need any help.

See you next week,
MikeH

Choosing the Right Self-striping Yarn for a Knit Shawl

HC1
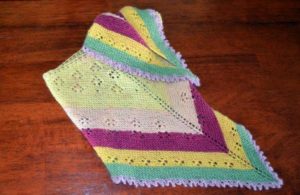
If you’d like to create a striped knit shawl but don’t want the fuss of changing yarns every couple of rows, you can achieve a similar effect with the right choice in self-striping yarn.

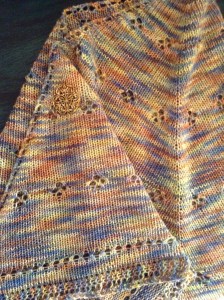
For the body of the shawlette pictured above I used Lang Mille Colori Baby merino (4-ply, fingering weight). When you choose a self-striping yarn it’s important to see a photo or sample of a swatch or item that’s been knit using the yarn, to ensure that you’re happy with the look.

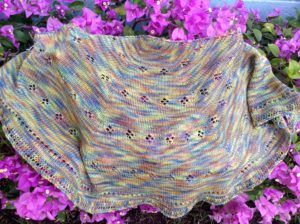
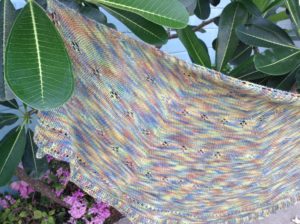
This colorful Leaf Edged Half Circle Eyelet Shawl is knit from the top down from a pattern that forms a half circle. The body is knit in one piece in a simple paired eyelet stitch, and then the lacy leaf border is knit using the live stitches at the bottom edge of the shawl. The top edge is finished by picking up and knitting stitches across the top, finishing with a picot bind-off.

HC2HC6

The simple eyelet lace stitch allows the color to be the focus of the shawlette, and the top and bottom edging in a complementary solid color provide a bit of elegance and interest.

I used nearly 2 full skeins of the Lang Mille Colori Baby merino yarn for the body (415 yards/380 meters) and less than half of the Manos Fino silk/wool blend (approximately 100 yards/90 meters) for the edgings. Both are fingering weight (4-ply) yarns and were knit with US 4 (3.5mm) needles.

The overall dimensions after blocking: 42×20.5 inches (107×52 cm)

An intermediate level knitter will find this pattern enjoyable. The edgings may prove to be a bit challenging for a beginner.

If you decide to use a different brand of yarn for the body, remember to check the self-striping pattern to ensure you’ll be happy with the result!

Colorways:
Lang Mille Colori Baby: 845.0039
Manos Fino: Topaz

The pattern is available for purchase on Ravelry and Craftsy. I hope you try it out and enjoy knitting the shawl as much as I enjoyed designing it.

Happy New Year!
MikeH

Thailand Memories

My original design, Thailand Memories Knit Lace Scarf is one of my favorites. It features temple roofs, unopened lotus buds, and the leaves of the sacred Bodhi tree, which are all elements found in the country’s Buddhist temples.
TM4Thailand’s natural environment, iconic images, and architecture inspire some of my designs, as you can see in the temple roofs, elephants, leaves, and blossoms in the patterns.

I like experimenting with stitch patterns and creating designs that incorporate images from my travels also. Lace knitting in particular interests me and in my scarf and shawl patterns you’ll find fall colors from the US, temple roofs from Asia, camels and elephants from Morocco, and flowers and garden images from England.

Working from memory, photos, graphics, and actual objects, I translate what I visualize onto graph paper in lace stitch patterns. For some reason, although I create my designs with charts, the instructions for all of my published designs are written. Maybe I’ll make the transition to charted patterns in the near future!

For the Thailand Memories pattern I wanted to integrate the leaf edgings into the overall pattern of temple roofs and lotus buds, so that they were knitted along with the body to the scarf, rather than added on later. This added some complexity to the pattern, but a satisfying result.

TM1

The yarn for this scarf project is Manos Silk Fino (a blend of fine merino wool and silk) in the color Topaz, which is similar to the color of the robes worn by many monks. You’ll see a range of tones in the piece as the yarn is both hand-spun and hand-dyed.

TM2

This scarf is knit in 2 pieces that are grafted by using a simple Kitchener garter graft. I used most of 2 50-gram skeins knitting the scarf with 3.5mm knitting needles (US 4).

When completed the Thailand Memories scarf measures 8 x 55 inches (20 x 140cm).

If you have some previous lace knitting experience you should enjoy knitting this pattern, and I will be happy to help with any questions you might have.

The Thailand Memories Knit Lace Scarf pattern is available on Craftsy and Ravelry and the scarf itself can be purchased on Etsy.

Happy New Year!
MikeH