Patterns available on Ravelry
Accessories available on Etsy
Instead of featuring one of my new patterns on today’s blog, I’m going to begin reporting on my adventure in knitting a man’s cardigan jacket (2 of them, actually). This is something I’ve been putting off for quite a while, and decided it was time to get started.
Another reason for not featuring a new design is that I’ve submitted 3 of my original designs to yarn companies to be considered for their collections, and can’t share them at this time.
(Update: I just received notice that one of the patterns has been purchased! I’m waiting to hear about the others.)
Here’s my progress on the man’s cardigan jacket so far:
1. After looking for just the right pattern for a long time (over a year), I found it – and decided to knit 2 cardigan jackets! Check out the pattern on this site. It’s perfect for what I wanted, and it’s free!
http://maddycraft.com/wp/mens-
2. Next I chose the yarn. This also took quite some time because I wanted a tweed-like look in a high-quality yarn. I found Rowan hemp tweed and that met my requirements. You can see the yarn by clicking on the following link:
http://www.knitrowan.com/yarns/hemp-tweed
(I chose the color teal for one and granite for the other)
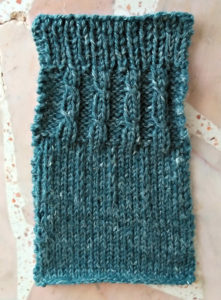
3. Here’s a step that I no longer skip! I knit a swatch incorporating the various stitch patterns to determine the needle size I’d need to use to get gauge. Here’s a photo of the blocked swatch.
The size suggested in the pattern didn’t work for my knitting tension and the yarn I selected, so I had to go down a size and found that I was able to get gauge.
4. Then I researched a cast on suitable for k1p1 ribbing, and found one that I really like, and is just stretchy enough to match the k1p1 pattern.
http://easyknittingdesign.com/
5. Thinking ahead about seaming edges I chose to add a selvedge stitch on each side. The link below will take you to a variety of selvedge options.
http://tessknits.com/1973/on-
6. Although there are many ways to knit increases, I wanted to find the best method for creating increases in k1p1 ribbing. Scroll down to the middle of this webpage to see this technique:
http://www.arendaholladay.com/
7. I’ve had to join new balls of yarn many times before, but I was looking for advice on joining a new ball of yarn in this type of project. I found a few sites that were useful and thought I’d share one with you here:
http://blog.shopmartingale.
I chose joining at a selvedge edge.
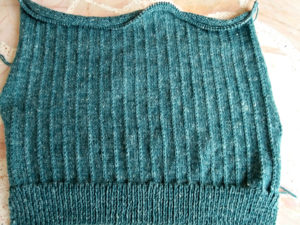
8. 17-1/4 inches later…
More next week as I finish the armholes, and shoulder and neck shaping – and move on to the left front.
Happy Knitting!
MikeH

