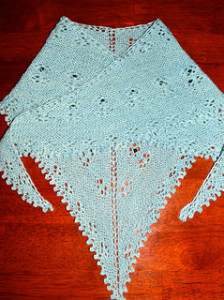
Knit Triangular Shawl Central Spine Increases: Visible and Invisible (Stockinette Stitch)

When you’re knitting a triangular top-down shawl you have a choice whether to make the increases along the central spine visible or (nearly) invisible. [If you’re knitting in garter stitch, refer to last week’s post on this topic.]

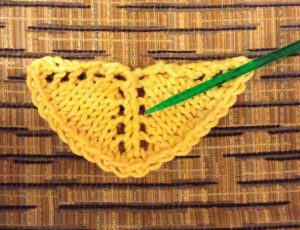
SSI1

If your design includes some eyelet or lace stitches, you might want to make the spine increases visible to add to the overall open or lace effect. If your pattern doesn’t incorporate lace you might want to make these increases less visible, creating a less interrupted fabric.

Here’s a way to construct a simple triangular, top-down shawl. Whether you’re looking to make the central spine increases visible or invisible, start out like this (abbreviation key at end of instructions):

CO 3 stitches
Row 1: K1, YO, K1, YO, K1 (5 stitches)
Row 2: Purl across
Row 3: K1, YO, K1, YO, PM, K1, PM, YO, K1, YO, K1 (9 stitches)
Row 4: Purl across

For visible central spine increases, continue as follows:

SSI2

Row 5: K1, YO, K3, YO, (PM) K1, (PM) YO, K3, YO, K1 (13 stitches)
Row 6: Purl across
Row 7: K1, YO, K5, YO, (SM) K1, (SM) YO, K5, YO, K1 (17 stitches)
Row 8: Purl across
Row 9: K1, YO, K7, YO, (SM) K1, (SM) YO, K7, YO, K1 (21 stitches)
and so on…
As you can see, for each odd-numbered row you start with K1, YO, and knit across to the center K stitch, and do a YO on each side of it, slipping the markers to keep them on each side of the central K stitch. YO before the last stitch, K1 (on each right-side row you’ll increase 4 stitches).

You continue this way until the shawl reaches the dimensions you want, and then bind off loosely.

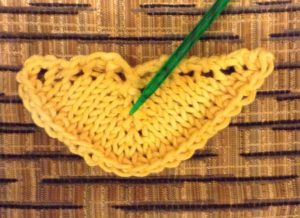
For invisible central spine increases, continues as follows (after the first 4 rows):

SSI3

Row 5: K1, YO, K3, M1R, (PM) K1, (PM) M1L, K3, YO, K1 (13 stitches)
Row 6: Purl across
Row 7: K1, YO, K5, M1R, (SM) K1, (SM) M1L, K5, YO, K1 (17 stitches)
Row 8: Purl across
Row 9: K1, YO, K7, M1R, (SM) K1, (SM) M1L, K7, YO, K1 (21 stitches)
and so on…
As you can see, for each odd-numbered row you start with K1, YO, and knit across to the stitch before the marker and M1R in that stitch, SM, K1, SM, M1L in the next stitch, knit across until you have 1 stitch left on your left needle, and then YO, K1 (on each right-side row you’ll increase 4 stitches).

Abbreviations:
CO (cast on)
K (knit)
M1(R or L)  (knit in the bar between 2 stitches, to increase 1 stitch)
YO (yarn over, to increase 1 stitch)
PM (place marker on needle)
SM (slip marker to other needle)

See my shawl patterns on Ravelry and Craftsy, and some of my hand-knit shawls on Etsy.

Happy knitting!
MikeH

Knit Triangular Shawl Central Spine Increases: Visible and Invisible (Garter Stitch)

When you’re knitting a garter stitch shawl, you’ll typically end up with an accessory that’s reversible and you’ll also have a choice whether to make the increases along the central spine visible or (nearly) invisible.

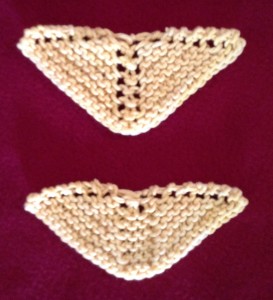
Spine increases garter 1
If your design includes some eyelet or lace stitches, you might want to make the spine increases visible to add to the overall open or lace effect. If your pattern doesn’t incorporate lace you might want to make these increases less visible, creating a less interrupted fabric.

Here’s a way to construct a simple triangular, top-down shawl. Whether you’re looking to make the central spine increases visible or invisible, start out like this (abbreviation key at end of instructions):

CO 3 stitches
Row 1: K1, YO, K1, YO, K1 (5 stitches)
Row 2: Knit across
Row 3: K1, YO, K1, YO, PM, K1, PM, YO, K1, YO, K1 (9 stitches)
Row 4: Knit across

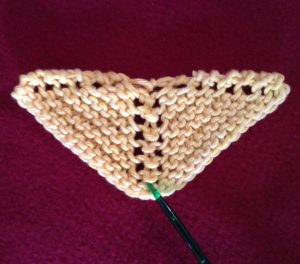
For visible central spine increases, continue as follows:

Spine increases garter visible
Row 5: K1, YO, K3, YO, (PM) K1, (PM) YO, K3, YO, K1 (13 stitches)
Row 6: Knit across
Row 7: K1, YO, K5, YO, (SM) K1, (SM) YO, K5, YO, K1 (17 stitches)
Row 8: Knit across
Row 9: K1, YO, K7, YO, (SM) K1, (SM) YO, K7, YO, K1 (21 stitches)
and so on…
As you can see, for each odd-numbered row you start with K1, YO, and knit across to the center K stitch, and do a YO on each side of it, slipping the markers to keep them on each side of the central K stitch. YO before the last stitch, K1 (on each right-side row you’ll increase 4 stitches).

You continue this way until the shawl reaches the dimensions you want, and then bind off loosely.

For invisible central spine increases, continues as follows (after the first 4 rows):

Spine increases garter invisible
Row 5: K1, YO, K2, KFB, (PM) K1, (PM) KFB, K2, YO, K1 (13 stitches)
Row 6: Knit across
Row 7: K1, YO, K4, KFB, (SM) K1, (SM) KFB, K4, YO, K1 (17 stitches)
Row 8: Knit across
Row 9: K1, YO, K6, KFB, (SM) K1, (SM) KFB, K6, YO, K1 (21 stitches)
and so on…
As you can see, for each odd-numbered row you start with K1, YO, and knit across to the stitch before the marker and KFB in that stitch, SM, K1, SM, KFB in next stitch, knit across until you have 1 stitch left on your left needle, and then YO, K1 (on each right-side row you’ll increase 4 stitches).

Next week, I’ll show you how this is done in stockinette stitch.

Abbreviations:
CO (cast on)
K (knit)
KFB (knit in the front and back of the stitch)
YO (yarn over, to increase 1 stitch)
PM (place marker on needle)
SM (slip marker to other needle)

See my shawl patterns on Ravelry and Craftsy, and some of my hand-knit shawls on Etsy.

Happy knitting!
MikeH
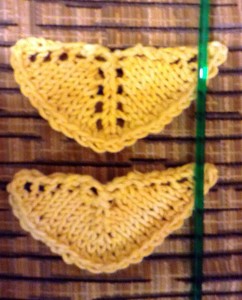
Designing a Lace Shawl Based on a Specific Yarn

VR1

Sometimes the yarn comes first! I found this yarn (on Etsy!) that was too hard to resist. It reminded me of a vineyard in the rain, although I’m not sure why!

So I bought a 100-gram ball of Wollelfe merino fingering weight yarn in the Bordeaux gradient and started designing a pattern to go along with it.
VR2
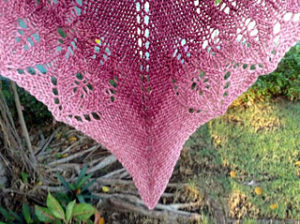
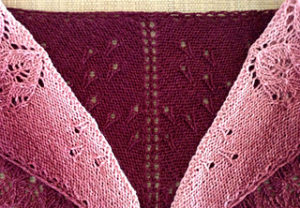
At the top center of Vineyard Rain you’ll find raindrops, and then through the body of the shawl lots of vineyard leaves, beginning with the bordeaux color and finishing off with a light rose – as a result of the rain!

There’s a background of purl stitches on the right side of the shawl, with some additional raindrops at the tips of the topline.

VR3

If you have some basic lace knitting experience you should have no trouble with the pattern and end up with a lovely accessory.

The shawl measures 23 x 48 x 52 inches / 
58.5 x 122 x 132 cm.

The pattern is available on Ravelry and the shawl is for sale on Etsy.

Happy knitting!
MikeH
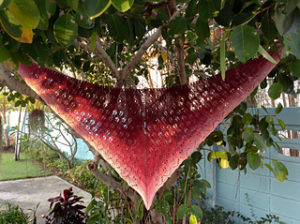
Buds and Flowers Reversible Shawlette: What a Difference Small Changes Can Make

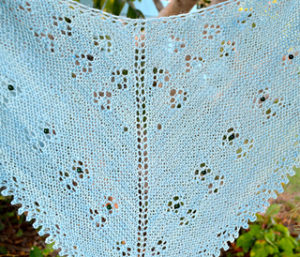
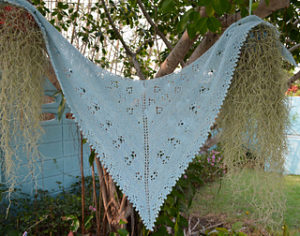
I wanted to show you another variation on a pattern this week. This time, a casual bandana-style lace knit scarf becomes a feminine shawlette in a lovely pastel shade, enhanced by jadeite beads.
BFA5
The changes to the basic Heart Shaped Reversible Buds and Flowers Shawlette pattern included a change in yarn color, an increase in the size of the knitting needles, and the addition of beads across one pattern row.

BFA2
I used larger sized needles than the pattern calls for: 3.75mm instead of 3.5mm (US 5 instead of US 4). I knit shawlette with the same weight yarn, but changed to Araucania Ranco, hand-dyed in aqua shades, using a bit less than 340 yards/310 meters – less than 1-100g skein.

A final touch was the addition of 18-6mm dark green jadeite beads. I used the crochet hook method to insert a single bead in the middle of each flower across the width of the shawlette.
BFA1
Dimensions after blocking:
21 inches (53.5cm) from the center of the top to the tip of the bottom point
47 inches (119.5cm) across, at the widest point
51 inches (129.5) measured across the top edge
BFA3

The pattern is one of mine on Ravelry. You’ll find instructions for the variation on that page.

If you like, you can buy this accessory from my Etsy shop.

Happy knitting!
MikeH